Chicken burgers

20140309-213718.jpg

After weeks and weeks of nothing but grey skies and drizzle, we have finally had a sunny weekend. We spent the morning at the zoo (“Joe, what would you like to see at the zoo today?” “I want to sit in the bus and the car that move next to the merrygoround”) and the afternoon playing in our friends’ garden. As we sat in the car driving to our friends, my phone beeped. A text from my friend Steve:

Think I’m going to have a cigarette in the sun now I know the trophy doesn’t exist.

I felt a brief flicker of guilt. Steve is an ex-smoker. I hate smoking and sometimes I have to stop myself from saying “DisGUSting” out loud when I walk past someone smoking in the street. Steve stopped smoking three years ago, or maybe it’s closer to four, and when he told us he’d stopped (“like, properly, this time”) Jon and I were very proud of him and we told him that if he could stay cigarette free for a year, we would get him a trophy. Throughout that year, whenever we saw him, he would say things like, “how’s the trophy coming along?” or, “only 6/7/8 months til I get my trophy!” My Grandpa, who used to be a jeweller, still, at the age of 93, has his engraving machine and does engraving for golf club trophies and the like. I knew he would have a few trophies and he would engrave one for us for Steve. Unfortunately, when we asked him, he said he’d just got rid of most of his stock but he had one or two left and we could have one of those – a choice of a bird or a ball. Neither of these seemed particularly appropriate but we thought maybe we’d take the bird and think of something funny to engrave it with that would make the random bird into something super witty about smoking.

Well, Jon and I aren’t that witty because we’ve been trying to think of a funny line to engrave the bird trophy with for around three years and we still haven’t come up with anything (“I think that’s a bit unfair,” Jon interjected while reading this over my shoulder. “I could have thought of any number of witty things if the trophy had been better.”) Meanwhile, Steve has been smoke free for ages and the longer it gets the more deserving of a trophy he becomes and the more pathetic the bird trophy seems. At the same time, we’re starting to feel like it is the promise of a trophy that is keeping him smoke free and so we are genuinely concerned that if he gets the trophy he’ll celebrate with a cigarette. I’ve now told him this trophy can only legitimately be awarded posthumously, as only then can anyone say with certainty that he is no longer a smoker. The trophy is no longer significant as a tangible object, but has turned into a symbol of aspiration. Or something.

Poor Steve. If that story about the trophy didn’t make you think I’m a terrible friend then this one will: a couple of years ago, Steve announced he was becoming vegetarian. I know, smoking AND meat! What pleasures will he renounce next?! Clearly no trophies were going to be awarded by me for this crazy decision. However, like any supportive friend, when he told me this about 30 minutes before inviting himself for dinner I found something nutritious and hopefully delicious to eat.

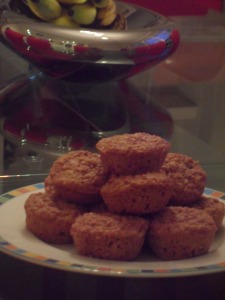
A few weeks later, he was at our house again for dinner along with another friend. It was a Sunday evening and we’d been lazing around all afternoon and I didn’t feel like doing a lot of cooking but I wanted something really tasty and sort of junk food-ish but not unhealthy. The answer was, as it so often is to so many hungry moments: burgers. I didn’t have any beef mince and I wanted something healthier anyway, so I took out a pack of chicken mince. The secret to chicken burgers is to put loads and loads of seasoning and things because unlike beef burgers where you want to taste the meat, a chicken burger would just be incredibly bland on its own. I grilled the burgers, fried some onions and made some oven chips (invest in a crinkle cutter for potatoes. About £2 and it’s one of the best kitchen gadgets you’ll own) and served them up. Everyone ate in silence in that way that shows that the food is really being enjoyed and it wasn’t until I put my own knife and fork down that something dawned on me and I turned to Steve and said, “hey, aren’t you a vegetarian?” Steve, with chicken juice and ketchup dribbling down his chin said, “oh s/*^!…. ”

I did feel a tiny bit bad but I maintain that it should be the job of the vegetarian to remember that he is a vegetarian.

(I should add that this burger has been Steve’s only slip as a vegetarian and he has been fully non-meat-eating since then!)

  • 1 pound chicken mince
  • 1 large onion
  • 1 egg
  • Matzo meal (medium) or flour if you don’t have matzo meal
  • Light soy sauce
  • Cajun spice mix
  • Tabasco
  • Salt and pepper
  • A little oil (groundnut is best)

1. Finely dice the onion. Heat the oil in a frying pan and add the onion, cooking until it is soft and golden.
2. Put the onion in a large bowl with the meat, and mix. Add the egg, and around 50g of matzo meal – you want to get to a texture that looks like it will hold a shape.
3. Add lots of the seasoning listed. I usually include around 2 tablespoons of soy sauce, a large tablespoon of Cajun spice, and a teaspoon of Tabasco. Mix it all together thoroughly and then form into burgers. I find that this quantity of meat makes enough for 4 burgers, and it is easiest if you heap the mixture onto a sheet of clingfilm, wrap it and then squash it into shape. Refrigerate before cooking, if you have time.
4. Cook under a hot grill (or on a barbecue for even yummier results), flipping half way through so that it is blackened on each side.

Good on its own, in a bun or pitta, or on a bed of leaves. Best served to a vegetarian.

*Approximate nutritional values (1 burger)*

  • Calories: 310 kcal
  • Carbs: 15.4g
  • Fat: 15.6g
  • Protein: 26.7g
  • Sugar: 6.8g
  • Sodium: 1864mg

*Baby-friendly version*

This is perfect for babies. Just remove the baby’s portion before adding the seasoning and add a little less or whatever your baby likes. For Joe I use a tiny bit of soy sauce (as it is so salty), and add tomato purée, and mustard powder.

Breakfast crumble

20140303-190022.jpg

You know those holy grail recipes – the quick, easy, tasty recipes which everyone loves and that you make time and time again to unanimous and glorious praise? I am always in search of those – who isn’t? – and a couple of days ago stumbled across Jamie Oliver’s chicken dim sum. It had chicken – leftover chicken, even, which is always great – a spicy and savoury sauce and it looked impressively exotic but sounded relatively simple to make. I managed to make the whole thing during a very interrupted nap time and as I was doing it I was mentally congratulating myself on a wonderful find, perfect for my big blog comeback piece. They look fabulous and impressive, are pretty healthy and once prepared take just 12 minutes to steam and serve. And bonus: with a slightly modified sauce they are fun and great for babies. Why isn’t everyone making these?

Well, for the simple reason that they are grim. The chicken filling was okay but the pastry was in part uncooked, in part gloopy, in part stodgy: in sum, yuck. I probably did it wrong – Jamie is all, just squash it out, fling it around, etc and usually that sort of minimal instruction, though annoying, is fine for me, but this time it failed or I failed and they were just unpleasant pasty puffs, some of which were sitting in pools of orange where the sauce had seeped through. I made 15 of them from one (very large) chicken breast and steamed 7 of them enthusiastically for supper which Jon ate and I picked at and then had something else. As you may know, there is nothing Jon likes less than wastage of food so although I would have happily binned them all, he declared them an acceptable lunch and has valiantly chewed his way through 4 each on two successive days. So although they are gross, rest assured that they have not been wasted and they are still better than a Pret sandwich.

Anyway, this post isn’t about the horrible dim sum but about the thing I made in the 12 minutes that they took to steam: a true holy grail recipe which I make for Joe’s breakfast. If you also have a toddler you’ll know that you can’t just ask a 2 year old to do something like get dressed and come downstairs for breakfast. Well, you can, but you will probably hear the word NO a lot and then end up chasing a naked child round the house while you try and throw a t shirt over his head like a hoopla. And all of this while answering a neverending stream of questions that begin with “why”. Parenting a toddler means becoming a master in the art of distraction and a nebulous and ever-changing concept called “making things fun”. So no, Joe can’t put his shoes on to leave the house BUT if his shoes should get hungry they may try to eat his feet and in so doing he may end up shod. And no, Joe can’t come upstairs to have his bath BUT if there were to be a whale in the bath who was calling Joe to come and scrub his back then Joe might go and have a look and in so doing get washed. On mornings when he goes to nursery, the simple tasks of getting him up, dressed, breakfasted, teeth brushed, hatted, scarfed and booted can all be an incredibly frustrating and lengthy exercise. Anything that makes this process easier at any stage is immediately latched onto and exploited until the life is wholly sucked out of it. For breakfast, for some reason at the moment it is often fun (and therefore quicker and easier) to go on a Crumble Hunt. The object of a Crumble Hunt is to find crumble at the end (of course), but sometimes we go on the hunt and we come back empty handed (or with a bowl of porridge), for such is life. When we do find crumble, we find something that is loosely based on a standard dessert apple crumble but can be made with almost any fruit (I like to use plums, but apples, peaches, berries, etc all work), covered with a not too sweet granola-ish topping. There are no quantities in the recipe below because it’s just to give you an idea of the basic principle which you can adapt to your tastes. I make this most weeks, as on days when there is crumble at the end of the Crumble Hunt, getting Joe through breakfast and out the door is just a little bit easier.

Breakfast Crumble

  • Fruit – I used about 8 red plums
  • Cinnamon
  • Honey, brown sugar or maple syrup
  • Whole rolled oats
  • Oat flour
  • Ground flax (linseed)
  • Applesauce
  • Other seeds of your choice, such as chia
  •  Coconut oil, or other fat of your choice
  1. Cut the fruit into small pieces and put in a baking dish. Add cinnamon, sugar, honey or maple syrup to taste and mix together.
  2. In another bowl combine the oats, oat flour and seeds and add a spoon or two of applesauce, maple syrup or honey, and coconut oil until the consistency of the oats is moist and sticky.
  3. Put the oat mixture on top of the fruit, press down and then bake for around 40 minutes.
  4. Serve cold or warm, on its own or with a dollop of yoghurt.

Genuinely healthy brownies

DSCF2784

Jon’s got a thing about mustard seeds at the moment. It’s getting really weird in our house now – they are cropping up in EVERYTHING. The effect ranges from the totally pointless – mustard seeds on popcorn (they don’t stick), to the frankly bizarre – mustard seeds in challah (you can’t really taste them but they look weird). There are mustard seeds in my rice, in my mashed potato, on my fish, really in anything where he is given the freedom to express himself through the spice cupboard. Perhaps when he reads this he’ll think again about how odd it is, but right now he just can’t think of any food that isn’t improved by the addition of mustard seeds.

Fortunately, he wasn’t in charge of planning the food for Joe’s second birthday party. He was a fantastic cake decorator – post coming soon on the birthday cake – but he didn’t decide on the recipes for the other food at the party, which all therefore remained mustard seed free. It’s a good thing too, because Joe isn’t shy about telling us what he thinks of our food. Joe saw the brownies I made here, uniced, in the kitchen a few hours before his birthday tea and asked for one. I gave him one, then another, and then another – they were a huge success. When we sat down to tea he was very excited to see them again with coloured icing to look like lego, and he asked for one in every colour. I’d especially made a creamcheese icing with minimal sugar which I had imagined he would like, since he likes creamcheese and it would be sweeter than normal, but he put it in his mouth and then spat it out with a look of disgust. “It’s not very tasty,” he explained with a serious face, not in a complaining way, just wanting me to understand why he’d been forced to expel it from his mouth. Luckily, with the icing then scraped off, they turned out to be just as “super yummy” as the brownies he had earlier.

From my point of view, the only problem with these brownies is that they aren’t chocolate. I know, if they’re not chocolate then they’re not brownies. But “blondies” sounds stupid and anyway, they are brown, not blonde. They are also vegan and sugar-free, and so I don’t expect you to believe me when I say that they are delicious, but they genuinely are, and they are perfect for babies and anyone else in your life with weird dietary requirements.

I found the recipe online here when searching for a brownie-type thing to use as the base of the lego cakes I wanted to make for the birthday tea. Since I was planning to make him a hugely elaborate birthday cake (which I couldn’t do in a sugar-free, healthy version), I wanted to make one cake thing that I would actually be happy for him to eat, and I thought these seemed perfect.

Makes around 20 mini brownies

  • 150g plain flour
  • 225g whole dates
  • 1 ripe banana (the riper the better)
  • 1 large tablespoon of peanut butter (or other nut butter)
  • 1 tablespoon of applesauce (you can make this amount from 1 apple)
  • 1 1/2 teaspoons bicarbonate of soda
  • 1/2 teaspoon of baking powder
  • 1/2 teaspoon cinammon
  • 1 teaspoon vanilla extract
  1. Prepare a baking tin of around 8×8 inches – grease it and line it, or use a silicon one where you don’t have to do any of that.
  2. Take the stones out of the dates and put them in a bowl of hot water for at least 15 minutes to soak.
  3. Put the dates with two or three tablespoons of the soaking water into a food processor and blend to make a paste.
  4. Mix all the dry ingredients together in a large bowl, and then add the applesauce, peanut butter and vanilla extract.
  5. Mash the banana, either by hand or in the food processor after you have removed the date paste.
  6. Combine the dates and banana with the rest of the mix.
  7. Put the mix into the tin, and bake on your usual oven baking temperature for about 40 minutes, or until a fork comes out clean.

As Joe told us, these brownies are good on their own. However, if you want to make the coloured creamcheese icing to turn these into lego cakes, then I used the recipe below, and coloured the icing using Wiltons Gel Colours (gel colours give a much stronger, brighter colour than liquid colouring and a tiny bit goes a long way). I then put smarties on the top to look like the bobbly bits on lego. This was actually really annoying, because I bought 4 tubes of smarties, imagining that this would easily provide enough of the right colours, and it really didn’t. Plus, since I was a child, the colouring in smarties has obviously got more natural and vegetable-based, which is a good thing for parents of hyper children, but means that the colours are much blander than I remember.

  • 200g Philadelphia or similar creamcheese
  • 70g butter
  • 100g icing sugar (the recipe actually called for 400g, but I was doing a low sugar version!)
  1. The butter needs to be softened and not fridge-hard when you start. The creamcheese should be in the fridge until needed.
  2. Cream the butter with an electric mixer until it has a whipped consistency. Beat in the cheese, but be careful not to overbeat, as the cheese can start to re-liquefy if you do.
  3. Sift the icing sugar and beat it in gradually.
  4. Put a small amount into another bowl and add a tiny bit of colouring (as in, the size of a mustard seed to start with, and then you can always add more as needed). Mix it in with a spoon and spread it onto your brownies.
  5. If you are doing lots of different colours, it’s easiest to do all of one colour, then wash up that small bowl and start again with another colour.
  6. Put the smarties on top and refridgerate until serving.

*Approximate nutritional values (1 brownie, no icing)*

  • Calories – 80.2 kcal
  • Carbs – 28.3g
  • Fat – 0.9g
  • Protein – 1.5g
  • Sodium – 11.4mg
  • Sugar – 9.1g

*Approximate nutritional values (1 brownie, with icing and smarties)*

  • Calories – 136.8 kcal
  • Carbs – 34.6g
  • Fat – 4.1g
  • Protein – 2g
  • Sodium – 23mg
  • Sugar – 11.8g


Mushroom barley soup

SAM_3326

Jon bought some new shoes last week. On one of those days when it was raining like the monsoon, he sent me an email just after arriving at work which said that his trustworthy Sketchers had holes in the soles and his feet were wet, so he had decided it was time to buy a new pair of shoes. Since this was an important purchase, he felt that it was only right to include me in the decision making process, and he sent me two links – “what do you think of these?” he wrote. I clicked on the first one and saw a pair of shoes almost exactly identical to the ones with the hole in the sole. I clicked on the second one, then went back to the email to check the links again. Oh no, wait, I squinted at the shoes on the screen and saw what I had missed the first time: the second pair had cream stripes, the first had tan. I emailed him back saying that they were both lovely and I couldn’t decide so I would leave it up to him. Several hours went past, and then I got another email. “I bought the second pair!” it said, triumphantly. “Great!” I replied, “when you get them, can we throw the old ones away?” “Well obviously,” he said, “why else would I have bought new ones?”

The new shoes arrived a few days later and sat in their box for a week. The shoes with the hole in the sole remained by the front door, in use. Then, today, Jon opened the box and carefully removed the new shoes. “Yay!” I said, “Let’s throw the old ones away now!” I went to remove the old shoes. “NO!!!” he cried, “I haven’t tried them on yet!” So I waited while he tried on the (same model, same size) new shoes, and then while he pronounced them a perfect fit. “Great, let’s chuck the old ones. Are you wearing the new ones today?” I asked. “WHAT??” He said, shocked. “No! It might rain! I need to wear these in first before I wear them out and get them ruined. THEN we can throw away the old ones.”

Is this just a man thing? A similar thing happens in this house with soup. We have a thing called Soup of the Week. It’s a soup that we make usually on a Sunday, and it lasts for most of the week, and it means that there’s always a healthy and delicious starter on week nights. We have a number of standard soups in our repertoire which get cycled around again and again, and then some new additions every now and then, most of which are OK, but don’t make it into the top list. One of Jon’s favourite soups is mushroom barley soup. It’s warming, really tasty, fragrant and perfect for winter. Jon LOVES it. He loves it so much he doesn’t really want to eat it, and conditions have to be really quite wintery before he will allow it. I think his fear is that he will have the soup, and then the week after will turn out to be worse weather and exactly the kind of conditions which would make him want to have mushroom barley soup, but he wouldn’t want to have the same soup two weeks in a row. “What soup shall we have this week?” I will ask as we consider the weekend Waitrose trip. “Mushroom barley?” “WHAT??” Jon will say, as the snow falls outside and we shiver under blankets. “It’s not cold enough for that!” Last year, I think we only had mushroom barley soup twice, because it was never deemed quite cold or wintery enough to make it. This week, it’s not actually that cold, but it is Christmas, and Christmas means wintery and cold, even if it actually isn’t. So, mushroom barley soup is bubbling away on the hob right now, Jon’s new shoes have been placed carefully back in their box and the old ones are waiting for him by the front door, as it’s going to rain tomorrow. Happy new year!

Makes around 8 portions

  • 50g dried porcini mushrooms
  • 150g shiitake mushrooms
  • 250g portabellini mushrooms
  • 3 medium carrots
  • 250ml pearl barley
  • 1 tablespoon soy sauce
  • Around 700ml vegetable stock
  • 1 bay leaf
  • Olive oil
  • Salt and pepper
  1. Soak the porcini mushrooms in around 700ml boiling water.
  2. Put the pearl barley in a sieve, rinse and drain it.
  3. Finely dice the carrots, and then heat about 1 tablespoon of olive oil in a large saucepan, and add the carrots. Keep it on a medium heat and stir occasionally.
  4. While this is happening, slice the mushrooms, and add these to the saucepan.
  5. Continue stirring and cooking, add a little salt and pepper and keep going for around 5 minutes.
  6. Add the barley to the carrots and mushrooms and continue to cook on a medium-low heat.
  7. Put a layer of kitchen towel into the sieve and put the sieve over the jug of stock or another bowl. Pour the porcinis into the sieve, so that the mushrooms can be removed and the gritty bits which are always hanging around in dried mushrooms stay on the kitchen towel.
  8. Finely chop the porcinis and add them to the saucepan.
  9. Add the stock, the mushroom liquid if not already combined, and the soy sauce. Add the bay leaf.
  10. Bring to the boil and then lower the heat to a simmer and cook for 20 to 30 minutes, until the barley is very tender. Add salt and pepper to taste.

*Approximate nutritional values (1 generous bowl)*

  • Calories: 124kcal
  • Carbs: 19.3g
  • Fat: 3.25g
  • Protein: 4.1g
  • Sugar: 2.1g
  • Sodium: 643mg

*Baby friendly version*

It is easy to take a portion out of this soup before adding the salt and soy sauce. Put that in its own saucepan, and simmer as above. With the tiny diced carrots, peal barley and mushrooms this contains lots of fun textures that a baby starting out with food would probably really enjoy.

Cranberry Sauce Muffins


SAM_3323

I love Christmas. I don’t celebrate it at all, which seems to be the key to why I love it so much. I love Christmas music in shops, I love the lights, the sparkly trees, and most of all I love Christmas Cheer, an ephemeral concept that means people who would normally shove you out of the way to get nearer to the front of the ridiculously long queue in Waitrose on Christmas Eve say, “no don’t worry, you were there first.” When I was younger I felt a little aggrieved that Christmas seemed to be like another, even better birthday (in terms of the presents), but I now feel genuinely sorry for everyone who has to actually go Christmas shopping, buy a million presents for a million people you rarely see, and then suffer through a lunch (which seems to start at about 4pm – why?) consisting of things like turkey and brussels sprouts.

Ah, the brussels sprouts. When I talked about broccoli on here before, I felt the need to explain, using one of my favourite lines from The Simpsons, why broccoli is not fit to be eaten. I don’t think I need to do that with brussels sprouts. I don’t think anyone takes them seriously as a food. The smell, for one thing! Of course, Jon claims to love them. I think he is only saying it to annoy me because I genuinely cannot believe that it is possible to love them. For that reason, I don’t feel bad at all that I have banned them from the house, and he obviously doesn’t love them that much because he has accepted the ban, with the caveat that he should be allowed them once a year. Because it is the season of goodwill, I have allowed that one time to be at Christmas. Not specifically on Christmas day, because we don’t do anything particular on Christmas day (this year, for example, we had pasta pesto for lunch and then seabass with lebanese spinach rice for supper and brussels sprouts would have been a horrific interruption to either of those), but at some point over the Christmas period.

So this year, the dreaded sprouts came out on Christmas eve, when we had some friends over for dinner. I also made roast chicken, and then since there was a roast and some sprouts it began to feel a lot like a Christmas dinner, so I thought, why not make cranberry sauce? I realise that cranberry sauce is primarily designed for turkey, and the reason for that is that turkey is generally dry and tasteless and needs sauces and relishes to make it taste better. Roast chicken does not, but I’ve never made cranberry sauce and it looked easy and nice, so I thought I would try it.

It was both easy and nice, but the quantities (I used this Delia recipe) weren’t quite right (i.e. there was loads), or perhaps because there wasn’t any turkey, people didn’t have as much of it. The result was that we were left with a lot of cranberry sauce and, after finishing up the leftover roast chicken, nothing to do with it.

And so I made muffins. Muffins are like the puttanesca of baking – you can just chuck anything in and they will usually work out well. In my head these are also known as “Breakfast Muffins” because they contain oats and it is well known that if you prefix something with “breakfast” then it instantly becomes healthier.

This made 26 muffins, which I baked without paper cases in muffin trays (muffins seem to do better without cases, as they can become soggy with the paper. Just grease the trays well beforehand).

  • Approx 24 fl oz cranberry sauce (3 American cups)
  • 6 fl oz maple syrup/agave nectar/sugar
  • 2 eggs
  • 5.5 fl oz (2/3 of a cup) vegetable oil
  • 8 fl oz (1 cup) water or milk
  • 12oz plain flour
  • 6oz rolled oats
  • 1 teasp cinnamon
  • 1 teasp salt
  • 1 teasp bicarb of soda
  • 2 teasp baking powder
  1. Beat the wet ingredients (cranberry sauce, eggs, oil, water/milk and the maple syrup/agave syrup if using. I used half and half maple syrup and agave syrup and no sugar).
  2. Mix the dry ingredients together, and then beat into the wet ingredients, but do not overbeat.
  3. Spoon the mixture into the muffin tray.
  4. Bake for about 20 minutes, or until a fork in the centre comes out clean.

*Approximate nutritional values (1 muffin)*

  • Calories: 164 kcal
  • Carbs: 24g
  • Fat: 6.7g
  • Protein: 2.6g
  • Sugar: 9.3g
  • Sodium: 74mg

*Baby-friendly version*

Muffins are excellent for babies, even those just starting out with food, because they are easy to hold and eat. Also, you can call them cakes and then they get very excited that they are having cake, even though the cake they’ve got has no sugar and little taste and is a very poor imitation of what they will later know as cake. However, cranberry sauce has a lot of sugar in it and you can’t do much about that because cranberries on their own are so bitter. If you’re OK with your baby having some sugar then these muffins will be very popular, but otherwise, cranberry sauce muffins are not really for your baby.

Vegetable spring rolls

A few years ago, Gordon Ramsay brought out a cookbook called 3 Star Chef. It contains lots of his recipes and secrets from his Hospital Road restaurant and when I saw it I thought, “What? Why would he bring out a book giving away all his secrets? What if people decide not to go to the restaurant anymore because they can just make it themselves?” Then I read this so-called “cookbook” and I realised why he had nothing to fear. Yes, this book has recipes and techniques for cooking, and actually some of them aren’t that difficult. But there’s no way that anyone would ever make any of them in full. Most of them have at least 3 different elements just within one part of a dish. Even if you literally had nothing to do and could devote a whole day to this, you still wouldn’t because after spending the whole day making them you wouldn’t have any energy left to entertain guests to eat them.

In a very small way (really very very small), I felt a little bit the same about starting my own food blog. If I give away all my secrets, will people still want to eat my cooking? Will people think, “nah, can’t be bothered to go to Katie and Jon’s tonight, I’ll just go on her blog and do it myself”? I don’t really think there’s much chance of this happening, but just in case, I thought I’d put a recipe up here that looks really complicated, so you’ll go, “what a complete FAFF. I’ll go to Katie’s and have it there instead.”

I absolutely love these vegetable spring rolls, and one of the best things about them is that you can make loads and shove them in the freezer, and they are actually even better when crisped up in the oven. Pre-Joe, when my mum and I were stocking my freezer with good hearty meals that we could eat in the weeks after he was born, I also made a massive bag of these to freeze. Not exactly an essential, but really nice, on those rare occasions when I could sit down to eat a whole meal without being interrupted, to have such a delicious snack or starter.

The best thing to use for these is a bag of those stir fry vegetables which you can buy ready-prepared from the supermarket. The reason they work well, apart from the convenience, is that they give a good mix of vegetables, and if you prepared all the vegetables yourself then you would have to make hundreds of spring rolls, as 1 carrot, 1 pepper, 1 bag of beansprouts, etc, would make a lot of filling.

I find that one bag weighing about 300g will make between 8 and 10 spring rolls, depending on how full you like them, and of course how big your spring roll wrappers are. I use wrappers which are around 20cm square (I think they are actually 215mm) – you can buy bigger and smaller, but these are the ones that I think work best. When I am making these, I tend to buy 3 or 4 bags of vegetables, and do a whole load in one go.

All you do is stir fry the vegetables, using a very little bit of oil. I also add a lot of grated ginger, because I like it, and plenty of soy sauce. You can add any seasoning you like, but the two important things to remember are (1) that by the time you are finished you don’t want to have any liquid remaining in the pan with the vegetables, as this could make your spring rolls go soggy, and (2) all the flavours that you want your spring roll to have need to go in to the vegetables. Obviously  you can dip your spring roll in any sauce you like, but the wrapper itself doesn’t add any flavour, so if your vegetables are under seasoned and tasteless then the spring roll will be the same.

I like to fry these in a very little bit of oil, turning all the time so that they crisp up evenly and on all sides. Jon always wants to experiment – “why don’t we BAKE them? Why don’t we try DEEP frying them?” but I’m like, “can we please just not ruin these spring rolls that I’ve spent ages folding, and do it the way we know?” So I haven’t tried either just baking or deep frying. Obviously deep frying would work, but I don’t want to do anything as unhealthy as that (and then what do you do with the oil, anyway? Yuk.) Baking, after brushing with oil, may work but I’m not sure if it would be as tasty. If you’re planning to do either of those things, please invite Jon over to try it with you.

Once you have stirfried the vegetables and made sure that no liquid remains, put them in a bowl and let them cool.

Crack an egg and put the white into a small flat dish – you will use this to seal the spring rolls.

Then take one spring roll wrapper, and put a small heap of vegetables in the corner of the pastry:

Then start rolling:

Then fold one side in to the middle:

Then fold the other side and continue to roll, until you just have a small flap remaining:

Then dab a little egg white on that flap, and roll it up and stick it down.

Fry, then eat or freeze.

(Shhhh… it’s really easy)

*Approximate nutritional values (1 spring roll)*

  • Calories: 99kcal
  • Carbs: 11g
  • Fat: 6g
  • Protein: 0g
  • Sugar: 1g
  • Sodium: 305mg

*Baby-friendly version*

These are perfect for babies (you can fill them with anything) but can be a little crispy if, like Joe, your baby doesn’t have many teeth. You could use Vietnamese wrappers instead, which are soft and don’t require cooking.

Monkey Bread

When I started this blog, I thought it would be all about family-friendly recipes that could be knocked up in a few minutes, and enjoyed by the whole family, small babies included. So far, that hasn’t really happened – I’ve found it hard to resist including recipes for chocolate mousse, cakes, brownies, etc and some other things that aren’t particularly quick or family friendly. I think that this is because, while my main cooking task is to make healthy delicious meals everyday for me, Jon and Joe, I can’t just do that, and I also want to experiment and try random new things, even if they ultimately turn out to be pointless.

Pointless. What is a pointless recipe? As long as it tastes OK and fills a hole, then how can a recipe be pointless? That is what I thought, until I made Monkey Bread. It’s not that it doesn’t taste nice – it does. It’s not that it’s difficult – it’s not. It’s just that I can’t quite see why anyone invented this food and what purpose it serves in the general culinary canon.

Monkey Bread is (of course) an American invention. Essentially, it is a “tear’n’share” bread, made from balls of dough stuck together. In its original form, it is sugary and cinammony and buttery, but I made its less common savoury sister, using olive oil and herbs. I love cinammon, but I feel like it is an overused spice in the US. When I was in DC, I felt like the months of September to January were shrouded in a cloud of cinammon – as you walked part the pumpkins outside Whole Foods, as you stepped into Starbucks with their red “Christmas” cups – it was like they pumped cinammon through the air vents everywhere to give you a warm, autumnal and festive sense. It sort of worked, but it also made you feel like you were being played, very obviously, by these big consumer giants, into believing that you were skipping merrily through autumn leaves into your village market to exchange silver coins for fresh marrows grown on your neighbour’s farm. Also, I can’t think of any particular place for a sweet, cinammony bread at my table so I thought that at least the savoury one would be something to snack on with our meals. Obviously all the recipes I saw for savoury monkey bread involved cheese, so that is definitely something you can do, but clearly not what I would do. Pointless as this bread is, the cool thing about it is that you can do anything you want to it, flavour-wise.

The picture you see above is attempt number two. We first tried this the week before, and I was running late so I sent Jon an email with the ingredients and told him to stick it all in the Kitchen Aid and make a dough, and then put it into a greased bowl to rise. I got home to find that he’d done it and dilligently sought out the warmest place in the house to let the dough rise, i.e. by the boiler. What he hadn’t done was added anything to the dough that would make it rise. This was because I’d forgotten to include yeast in the list of ingredients. Jon said, “Yes! I noticed that and thought it was funny that there was no yeast. But then I thought, perhaps there’s something else in here that would cause it to rise magically!” A+ to Jon for noticing the lack of yeast and considering its effect on the rising. B+ to Jon for thinking that there may be a magical ingredient in the dough. F to me for forgetting to include the yeast in the recipe. (We’ve made this mistake with bread before, by the way – about two weeks after Joe was born I made a bread with no yeast or salt, which unsurprisingly turned out to be a small baked rock).

So – what are the advantages of this bread? It’s quick and easy to make without any special equipment (though if you have an electric mixer it takes a lot of the pain out of kneading). Depending on what you put on it, it can certainly be a good bread for babies as it’s easy to eat and tasty. It would also be a fun thing to make with children, who would probably love rolling the dough into balls and squishing them together. If you’re having a dinner party and you want bread to be part of it (maybe to go with soup), then this would look cool on the table and it’s fun that everyone can just reach over and pull a piece off (which always looks a bit animal-like if it’s done on a normal loaf of bread).

Give this a try. But don’t be surprised if, after you’ve made it, you think, WHY?

  • 450g bread flour (you can use a combination of different flours, but make sure that at least 300g is strong white flour. We did 350g white and 100g rye)
  • 1.5 tsp salt
  • 1 packet of dry yeast
  • 250ml warm water
  • 2 tablespoons olive oil
  • 1 egg
  • Herbs, spices, etc of your choice, plus more olive oil or melted butter or whatever you choose. We used olive oil and fresh thyme, since that was what we had, but garlic and rosemary would be nice, and so would caramelised onions. You could also use grated cheese – I think you would need about 50g grated cheese.
  1. Combine the dry ingredients in a large bowl or the bowl of your electric mixer.
  2. Combine the wet ingredients in a smaller bowl, and then add to the dry ingredients. Mix with your hands, or beat with the electric mixer. Add more flour if necessary to get to the desired consistency, which is a smooth, soft, elastic dough.
  3. If doing by hand, knead for around 10 minutes. Alternatively, use the dough hook of the mixer and keep it on low for 10 minutes.
  4. Lightly oil a big bowl (which should allow the dough to rise to around double its size) and put the dough in it. Grease a piece of clingfilm and cover the bowl tightly, and then put the bowl somewhere warm.
  5. If you don’t have anywhere warm in your house, then you can put a small saucepan of water on the hob, bring it to a simmer, then turn off and put your bowl on top of that.
  6. Allow the dough to rise to double its size – it can take 30-60 minutes for this to happen.
  7. In a small bowl, combine the extra olive oil, herbs, cheese or whatever you want.
  8. Prepare your baking dish. You could use a cake tin, or a glass dish, or anything you like. I used a glass dish which had a base of about 18 cm)
  9. Divide your dough into 32 pieces, and roll each into a ball. (I did half the dough, then half again, then half again, then half again – but I’m sure you worked that out for yourself.)
  10. Dip each ball into the bowl of oil and herbs, and then place it in the dish, forming a layer of balls all squished next to each other, and then on top of each other.
  11. Cover the dish with the greased clingfilm, and leave it to rise again in a warm place for another 20 to 30 minutes.
  12. Pre-heat the oven to 180C/350F.
  13. Put in the oven and bake for around 35 mins, or until golden brown.

*Approximate nutritional values (1 “ball”)*

  • Calories: 63.5kcal
  • Carbs: 9.5g
  • Fat: 2g
  • Protein: 1.75g
  • Sugar: 0.2g
  • Sodium: 86.3mg

Carrot, apple and blueberry muffins

Everyone where I live has a Bugaboo. And if they don’t have a Bugaboo, then there’s a good reason why, such as they don’t have a baby, or, more likely, they’ve made a very thoroughly researched decision as to why another buggy is better – the City Mini (“the amazing fold!”) is also quite popular, as are iCandies (“I wanted to support a British company”) and Maclarens (“simple, sturdy, effective”). (My buggy is obviously better than all of these – the Uppababy: upgraded, cheaper Bugaboo, with HUGE basket). But no one just went to Argos and picked up a buggy for £29.99. Not for our babies.

That’s because this is a pretentious neighbourhood with lots of neurotic but style-conscious parents who buy all of this top-of-the-range, probably mostly unnecessary baby stuff.  The plus side, if you’re writing a blog and you need material, is that if you hang around these parents, you hear some funny and cringeworthy things. A few months before Joe was born I was in a local, very expensive baby shop buying a present for a friend, and a couple came in with their baby and asked the shop assistant for “a developmental toy for our very bright 8 month old. He’s already bored with the toys he’s got and keeps throwing them out the buggy. What new developmental toys can you recommend?” Even the shop assistant, who must hear this kind of stuff all the time, looked a bit baffled, but then she realised that these customers were easy marks and she started throwing toys at them (the dad then thrust each toy in turn in front of his son’s face, and then decided whether to buy it based on the reaction he got. Tears meant “this toy is a bit babyish for him”, but a tongue poking out or a grabbing hand meant it was stimulating enough that it went into the shopping basket.)

But a couple of weeks ago, I was out with Jon and Joe for coffee in Primrose Hill, and I heard myself say, “No Joe, please take your fingers out of mummy’s cappuccino, you’ve got your own cappuccino right there.” Cringe. Even worse, a couple walked past as I said it and looked at me with the same unbelieving sneer I gave to the development toy people. Joe didn’t have his own cappuccino, by the way. I’m not crazy. He had his own babyccino, and if you don’t know what that is, well, I’m not sure you should even be reading this blog.

Anyway, the point of all of this was simply to say that there’s lots of things I didn’t imagine myself saying or doing before I became a parent (and it’s not just me: this morning I heard Jon say, “Joe, if you don’t touch daddy’s wee then you can flush the toilet afterwards.”)

Another thing is the constant the singing of annoying children’s rhymes. Not to Joe – we do that of course, but it doesn’t stop when he goes to bed or we go to work. We leave the house to the tune of “Wind the Bobbins” and “The Wheels on the Bus” and, most recently it has been “The Muffin Man”. I know that seems like a really a tenuous link to for a recipe for muffins but it actually isn’t – singing “The Muffin Man” as I sat at my desk (it’s OK, I have my own office) was what prompted me to send Jon my shopping list for the muffin ingredients I didn’t have.

I invented these muffins shortly after Joe started eating real food. They make an excellent, healthy snack and we always have a bag of these in the freezer, as they freeze well and can be restored by putting them in the oven for about 15 minutes, or just leaving to defrost (the oven makes them taste fresher, though). They would also make a tasty, healthy snack for adults and older children.

Makes about 24 mini muffins or fairy cakes

  • 2 eggs
  • 100ml sunflower/canola/rapeseed oil
  • 8 oz self raising flour
  • 2 oz porridge oats
  • 2 carrots
  • 2 eating apples
  • Approx 4 oz blueberries
  • 1 teaspoon cinnamon
  • 1 teaspoon allspice
  1. Grate the apple and carrot or use a food processor to finely grate them.
  2. Put all ingredients into a bowl, mix with a wooden spoon.
  3. Spoon into muffin tins or fairy cake cases Cook on 160c fan, or 180c normal for about 15 minutes, or until a toothpick inserted comes out clean.

*Approximate nutritional values (1 muffin)*

  • Calories: 95 kcal
  • Carbs: 10.9g
  • Fat: 4.9g
  • Protein: 1.8g
  • Sugar: 2.3g
  • Sodium: 9.5mg

Heston’s roast chicken

In my last post, I admitted that I’m a 95% person. I think I should also add that I’m inherently a bit lazy. I’m quite resourceful at being lazy – I’m always looking for the easiest and quickest way to do something, and if that means that the thing isn’t 100% perfect, well, that’s OK. It’s worth taking a hit on perfection if I can make more time to do other things (or just sleep). It’s why I often say I’ve “adapted” a recipe. What I mean is, I’ve tried to cut as many corners as possible (put a risotto in the oven/put all the vegetables in the food processor/add ingredients all together instead of in stages) while still hoping that the recipe turns out vaguely as planned.

Most successful chefs do not do this. Some tirelessly seek out the “best” way of doing something, and the most famous exponent of that is Heston, when he did his series of how to make The Best Chips or Burger or whatever. On one of those programmes, he did a thing on how to make the best roast chicken. I love Heston (as you can see – we’re on first name terms) but I really don’t have the time or inclination to do most of the stages in his recipe. Also, I haven’t had roast chicken the way he is recommending (and I never will, because it includes butter), but I don’t totally believe it is The Best because, in his extensive survey of what makes the best roast chicken, I don’t believe he was invited to dinner at my parents’ house in France, where my mum roasts these amazing organic French (kosher) chickens which are incredible and cannot be improved.

However, I do think he knows what he is talking about with flavours and moisture and sciency things, so I did want to sort of attempt the recipe. Google “Heston’s roast chicken” if you are interested, but i think the principle, in a nutshell, is that cooking it on a very low heat for a long time helps to seal the flavours in and keep the chicken moist, resting it keeps the juices in the chicken and lets them percolate back into the meat, and then roasting on a very high heat crisps it up. Also, obviously Jon loves Heston’s scientific approach, because Jon shouts “that’s science!” whenever he comes up with a plausible rational explanation for something, and because Heston has confirmed some of Jon’s own techniques, such as rinsing potatoes before doing anything with them to remove excess starch.

The stages in his recipe involve:

  1. Brining the chicken overnight. I got all excited about brining, when I first read about it some time ago and was determined to do it. But then I discovered that you shouldn’t brine a kosher chicken (or turkey) because essentially it has already been brined as part of the koshering process. Not to the exact Heston specifications, but the purpose of the brine is basically to lock in moisture through soaking it in a salty solution (my GCSE biology tells me this is through osmosis), and kosher chickens have to be salted in this way to make them kosher. I even read somewhere else that sometimes people buy kosher chickens as a shortcut. I never thought there would be a bonus to buying over-priced kosher chickens, but perhaps this is it. So I skipped several hours of Heston’s recipe without having to do anything at all!
  2. Putting lemon and thyme inside the chicken and rubbing the bird with butter. Well, I don’t agree with this. I’ve tried putting lemons, garlic and other things inside chickens before (dead ones, mostly) and they never seem to give much flavour. Not compared with putting an onion inside, which really does. Herbs, like thyme, rosemary, etc I think do add a lovely flavour and also make it smell amazing. So I put an onion inside instead. Now, on to the butter. Generally, when roasting a chicken I don’t think it needs any extra fat, so I season it but that’s it. However, over the summer, whenever that was, we did a barbecued chicken on a couple of occasions, using a very nice recipe and technique from America’s Test Kitchen. Since that was going on the barbecue, it did require some fat on it, and the recipe used a rub made from olive oil, thyme, rosemary and lemon (see below), and it was fragrant and delicious. So I decided to make this rub again, and put it on the chicken where Heston was calling for butter. I also made a bed for the chicken of sliced onions, as this creates a delicious onion gravy-ish thing that everyone loves.
  3. Cooking the chicken for 3-4 hours on a very low heat. As in, barely hot – about 90C or 70C in a fan oven. You can hardly smell anything while it is cooking, but apparently this is a good thing because when something gives off a strong smell, it is losing the flavour along with the smell.
  4. Resting the chicken for 45 minutes. You take the chicken out, cover it with foil and let it stand. My grandma always “rests” chicken after roasting and we always used to get annoyed about it – “I like HOT chicken”. But, it turns out she was right in this, as in so many things!
  5. Basting the chicken. You melt butter and add white wine and then brush it over the chicken, now breast side up. I didn’t bother with this – partly because I missed it in the recipe the first time round, but also because it just didn’t seem necessary. Next time, I might try it using the olive oil from the rub that I just put on the onions in the base when I did it last time.
  6. Putting the chicken back into a very hot oven. I think this is what makes it excellent. You turn the oven up as high as it will go and put the chicken back in, breast side up, for about 10 minutes, or until it is golden brown. The only problem with this, for me, was that I was juggling putting the chicken in with the other things in the oven, like roast potatoes. So I haven’t actually done this as instructed. I have put the chicken back in at a hot temperature (but not the hottest), and left it in there for about 20 minutes, when it is golden brown.

The result was a very delicious roast chicken. It honestly wasn’t THAT much more amazing than my regular roast chicken, but it was very good and very moist, and the moisture and flavour really stood out when it came to eating the leftovers cold the next day.

This is the recipe for the rub:

  • 75ml extra virgin olive oil
  • 8 medium garlic cloves, minced or pressed
  • 1 tsp grated zest plus 2 tbsp juice from 1 lemon
  • Pinch crushed red pepper flakes
  • 4 tsp chopped fresh thyme leaves
  • 3 tsp chopped fresh rosemary leaves
  • Coarse sea salt and ground black pepper
  1. In a small saucepan, combine the oil, garlic, lemon zest and pepper flakes. Simmer and stir frequently over medium-low heat for about 2 minutes.
  2. As soon as it reaches a simmer, add 3 teaspoons thyme and 2 teaspoons rosemary. Cook for 30 seconds more.
  3. Strain the mixture through a fine mesh sieve over a bowl, making sure to push the solids with a spatula to remove all the oil. Transfer the solids to another bowl and set both aside.
  4. Mix together 1 tablespoon salt and 1 teaspoon pepper. Mix 3 teaspoons of that salt mixture with the cooled garlic mixture.
  5. Spread the salt and garlic mixture under the skin that you loosened earlier. Sprinkle the rest of the salt mixture on the underside of the chicken.
  6. Whisk the lemon juice into the olive oil and either drizzle onto the onions or rub on the chicken, or use as a baste before putting the chicken back into the oven at high heat, OR use as a dressing to serve with the chicken.

This recipe is totally baby-friendly – just don’t give pieces which have the salty rub on them.

*Approximate nutritional values*

  • Calories: 240 kcal
  • Carbs: 0g
  • Fat: 12g
  • Protein: 30g
  • Sugar: 0g
  • Sodium: 560mg

Zebra cake

I’m not good at art. I can’t draw and I don’t reliably colour inside the lines because I’m just a bit too slapdash: I’m not careful and (this is the main problem) I find it hard to care enough about it. I’m really just a 95% person. Maybe even 85%. My favourite type of creative thing is something that looks really good but is really easy to achieve, or at least doesn’t require 100% perfect input. For example, the hat I made a couple of years ago as a birthday treat.

I know it was my birthday more than a week ago, so that is practically ancient history, but in the spirit of one of my friends, who doesn’t just have a birthDAY, she has a birthday WEEK, with celebrations designed to drag the event out for as long as possible, I think I can still talk about birthday events. Some years I end up not doing that much for my birthday and I feel like it goes by with barely a flicker. But this year, I managed to extend the celebrations for a bit longer and went out for a lovely dinner with my family and to a special surprise treat evening out with Jon this week too. And a couple of years ago I extended my birthday events even longer, as Jon bought me a day of hat-making which I did nearly 6 months later.

I love hats! Maybe not as much as Dannii, but I love them nonetheless. I particularly love cloche hats because they make me feel like I’m in the House of Eliot (WHY don’t they bring that programme back?) and are just generally cool and beautiful. Anyway, I had a lovely day in an atelier in Soho with a milliner and one other student, and I made a cloche hat from beginning to end – cutting the fabric, blocking it (I found out that I have a smaller than average head, so I had to make it smaller after blocking it too, which is extra skilled), steaming it, and then decorating it. The finished article actually looks really good and I don’t think you would think I made it. This is largely because the milliner “helped” with all the hard parts, but I did do quite a lot of it, and, crucially, I chose to keep the design as simple as possible so that there was less to ruin.

With food (oh yes, that’s what this blog is about) I always want to present things nicely, but it never quite happens because once I’ve made it I can’t be bothered anymore, I just want to eat it and I hope that it will taste good enough that no one will care what it looks like. But I also know that even I think that something that looks amazing tastes better.

With all that in mind, when I saw this cake in a magazine I thought “I’ll never be able to make it look like that” but the instructions did sound quite simple so I decided to give it a try, in case it turned out to be one of those things that makes people go “wow!” but was actually really easy to do. And it was – what a find! This is the cake to make if you have people coming for tea, or you want to take a cake into work and you want people to think you’re really talented and creative (but of course NOT the cake to take to work if you are worried that people might not think you’re busy enough) and you don’t have an electric mixer, because you really don’t need one. I will add though, that the process of putting the cake into the tin took me about 20 minutes, so bear that in mind as you prepare. While it is not baby-friendly, I think that children would really enjoy making this.

Zebra Cake (looks like, not made of) from Lorraine Pascale

  • 250ml sunflower (or other flavourless) oil, plus extra for greasing
  • 250g caster sugar
  • 100ml water or milk
  • 4 medium eggs (at room temperature)
  • A few drops of vanilla extract
  • 300g self-raising flour
  • 1 tsp baking powder
  • 25g cocoa powder
  • 1 orange
  1. Preheat the oven to 180C/Gas 4. Grease the bottom of a 24cm sandwich tin with a little oil, line with baking parchment and oil again. Set to one side on a large baking sheet.
  2. Take two mixing bowls. Put half of the oil, sugar, milk/water, eggs and vanilla extract into each bowl and beat everything together well. It is best not to use an electric whisk as it will introduce too many bubbles.
  3. Sift 175g self-raising flour into one bowl, along with ½ tsp baking powder. Mix well and set aside. This is your vanilla mix.
  4. Sift the remaining 125g self-raising flour and ½ tsp baking powder into another bowl, along with the cocoa powder. Finely grate the orange zest in, mix everything together well and 
set to one side. This is your chocolate mix.
  5. Now, put 1 tbsp of the vanilla mix in the middle of the tin. Then, using a clean tablespoon, put a blob of the chocolate mix 
in the middle of the vanilla one. Keep doing this, alternating between vanilla and chocolate, 
so you form a type of “bull’s eye” or “target board” look. Each time you dollop a blob in, the whole mix will spread out on the base. By the time you have used up both the cake mixes, they should have just reached the edge of 
 the tin.
  6. Bake in the oven for about 
35 minutes. Check the cake is cooked by inserting a skewer 
into the centre – it should come out clean. If not, return the cake to the oven for another 5 minutes or so, until cooked. Once the 
cake is ready, remove it from 
the oven and allow to cool for 
a few minutes in the tin. Then carefully remove from the tin 
and leave to cool completely on 
a wire rack (but it is also fine to eat it warm).

There’s no baby friendly version as there’s really no alternative for the amount of sugar this contains. I will do a more baby appropriate recipe next time, I promise!

*Approximate nutritional values (1 medium slice)*

  • Calories: 282kcal
  • Carbs: 29g
  • Fat: 16.2g
  • Protein: 3.8g
  • Sugar: 15.9g
  • Sodium: 28.4mg